In this document, we will show you how to create an IPsec LAN to LAN VPN tunnel between a Vigor2860 and a Vigor3900 using Aggressive Mode. We will use the following network topology.
Image may be NSFW.
Clik here to view.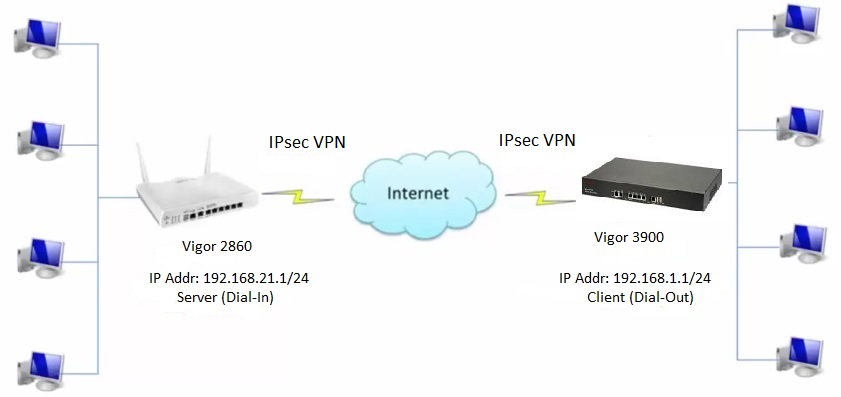
Configuring Vigor 2860
1. Connect to the router.
a. Use your internet browser to login to the router web interface.
b. The default IP address for the router is 192.168.21.1
c. Default username and password are:
Username: admin
Password: admin
Image may be NSFW.
Clik here to view.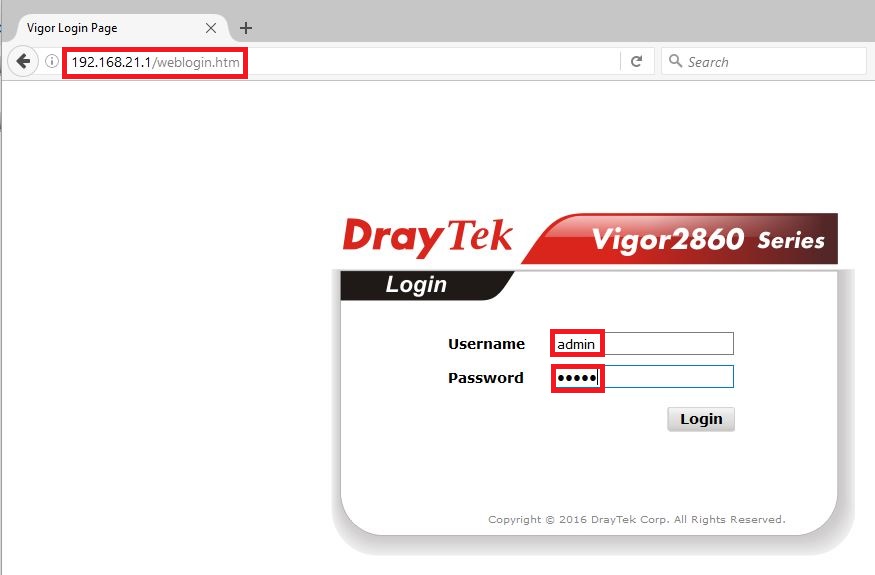
2. Check that the router connected to the internet by looking at the router dashboard page.
Image may be NSFW.
Clik here to view.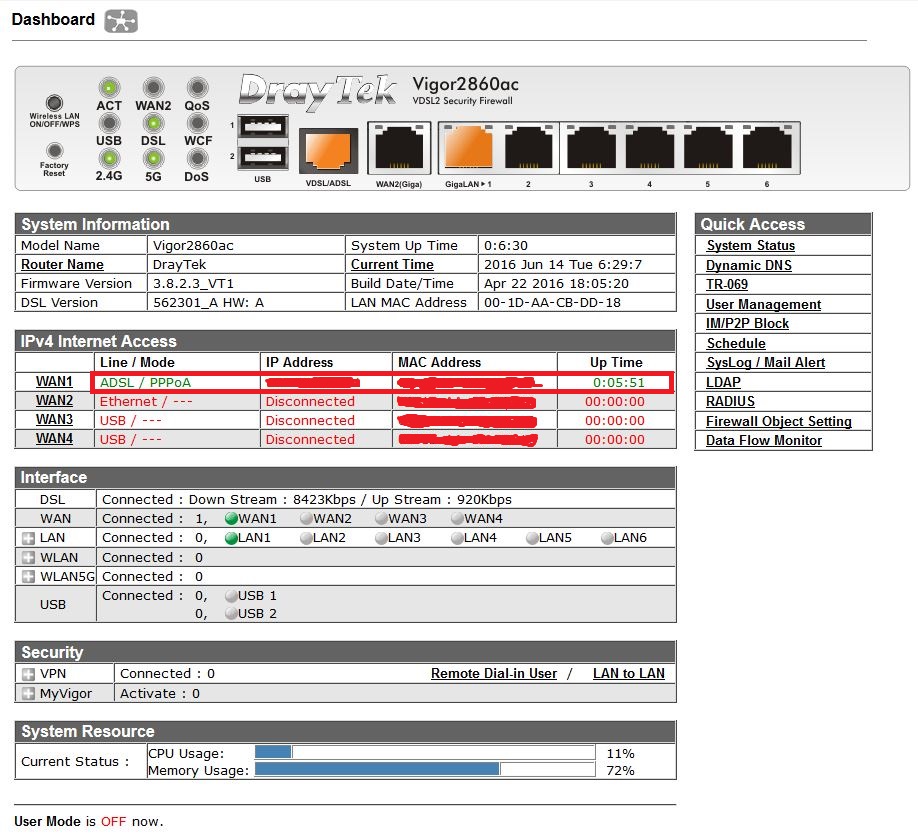
3. Go to VPN and Remote Access>>LAN to LAN configuration menu.
Image may be NSFW.
Clik here to view.
4. Select the first available index to start the configuration.
Image may be NSFW.
Clik here to view.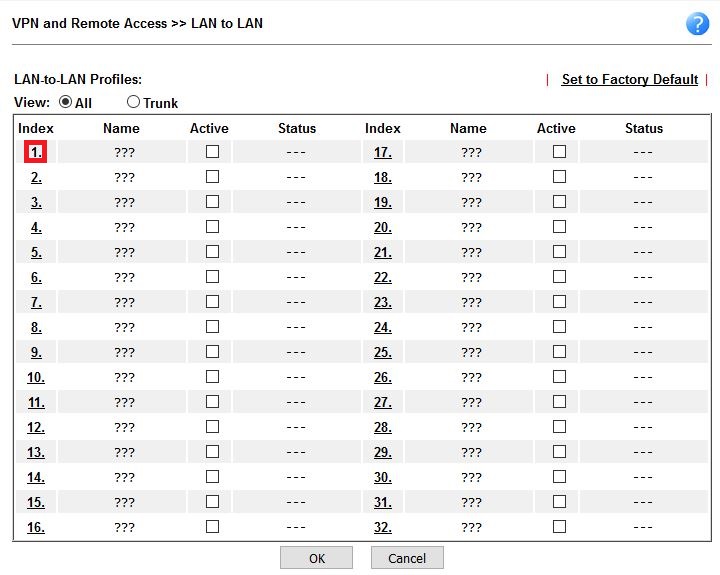
5. Create your IPsec VPN Profile.
a. Enter a profile name.
b. Select (Enable this profile) and Dial-in.
Image may be NSFW.
Clik here to view.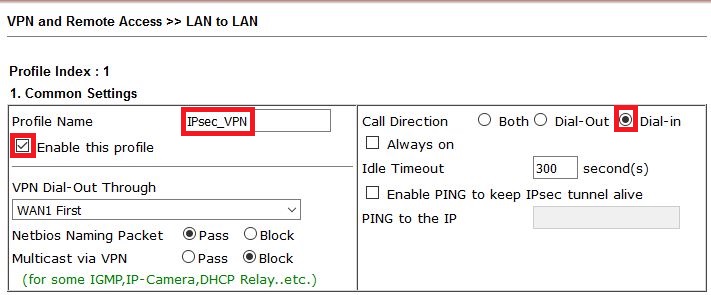
c. Under Dial-in settings, select IPsec Tunnel and Specify Remote VPN Gateway.
d. Select IKE Pre-Shared Key and then enter your chosen Pre-share Key then click OK.
e. Enter your chosen Peer ID.
f. Enter the Remote Network IP (IP address xxxx), which is the local LAN IP address of the Vigor 3900 router.
g. Click OK to save your settings.
Image may be NSFW.
Clik here to view.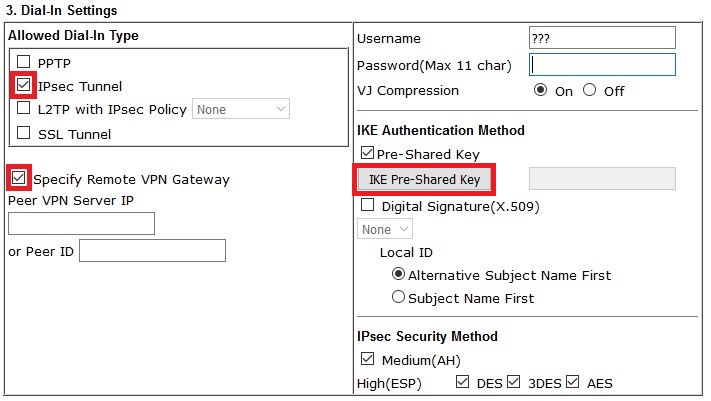
Image may be NSFW.
Clik here to view.
Image may be NSFW.
Clik here to view.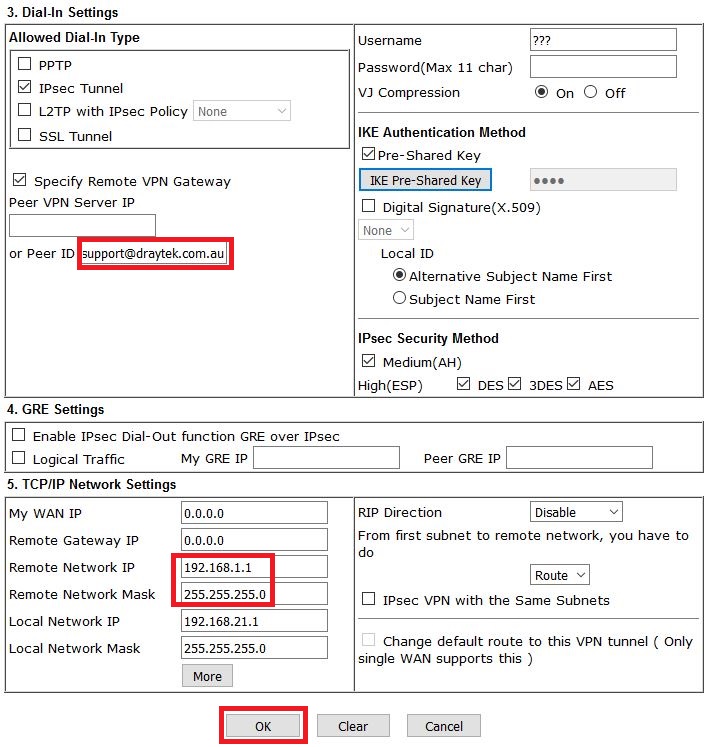
Configuring Vigor 3900
1. Connect to the router
a. Use your internet browser to login to the router web interface.
b. The default IP address of the router is 192.168.1.1
c. Default username and password are:
Username: admin
Password: admin
Image may be NSFW.
Clik here to view.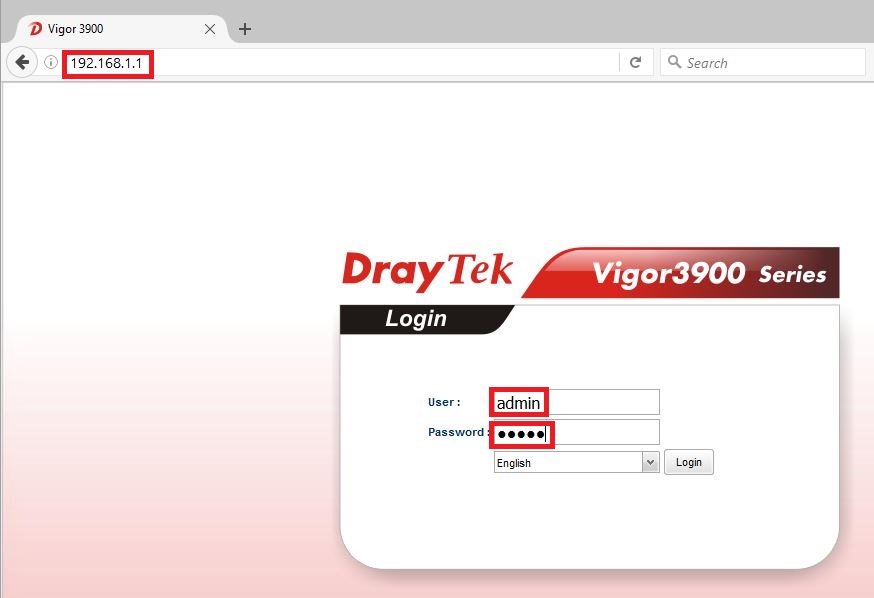
2. Verify that the WAN or Internet connection is up.
Image may be NSFW.
Clik here to view.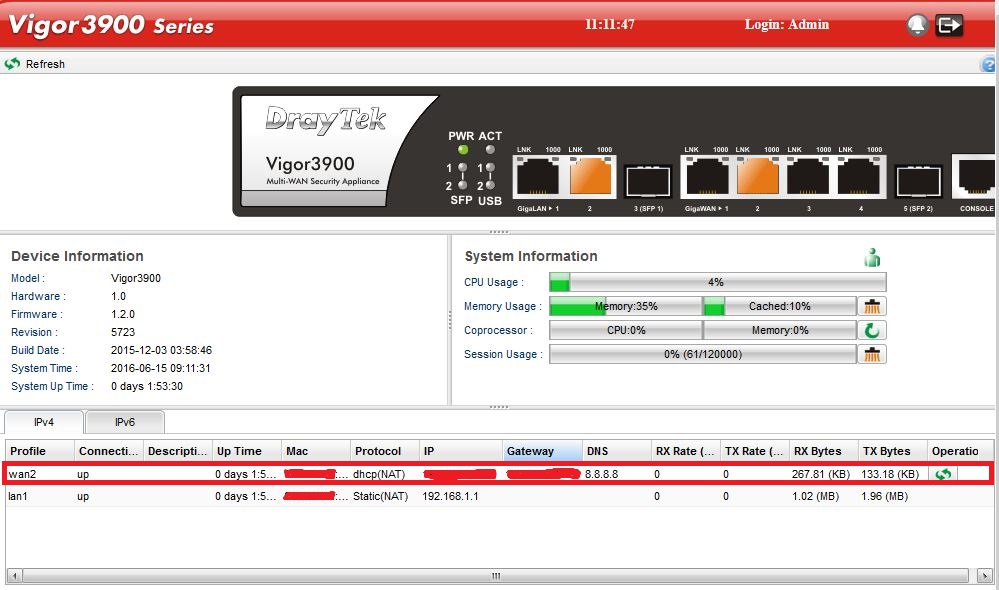
3. Go to VPN and Remote Access>>VPN Profiles.
Image may be NSFW.
Clik here to view.
4. Create your IPsec VPN Profile.
a. In the VPN Profiles page, select IPsec tab and click (Add).
b. Enter a Profile name and select enable.
c. Enable Auto dial-out and select Always dial-out.
d. Select the interface the VPN tunnel is going to use (e.g. WAN2).
e. Enter Local IP/Subnet Mask; this is the local IP address/Subnet Mask of your Vigor 3900 router.
f. Enter Local Next Hop; this is the local IP address of your Vigor 2860.
g. Enter Remote Host; this is your WAN/Public IP address of your Vigor 2860.
h. Enter Remote IP/Subnet Mask; this is the local IP address/Subnet Mask of your Vigor 2860 router.
Image may be NSFW.
Clik here to view.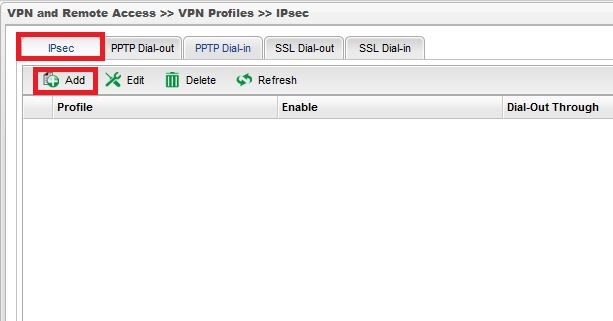
Image may be NSFW.
Clik here to view.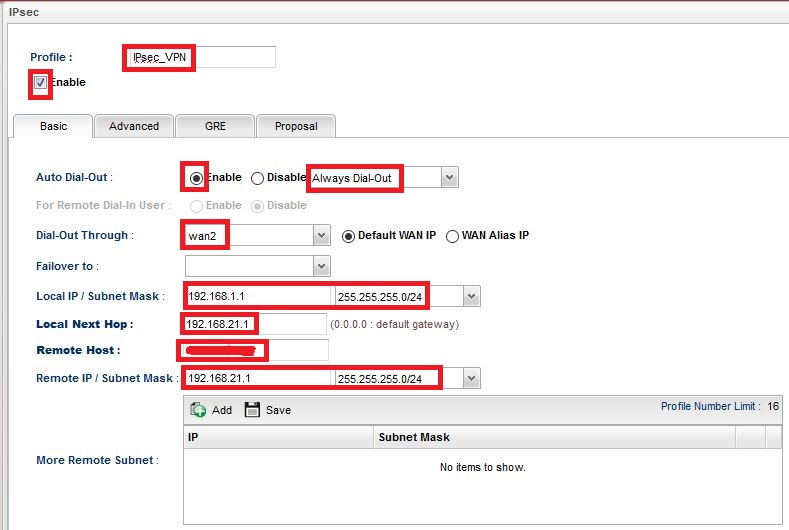
i. Select (Aggressive mode) under IKE Phase 1, (PSK) for Auth Type, and enter the same Pre-share key that you used for Vigor 2860 router.
j. Enter Local ID that is the same as the Peer ID of Vigor 2860 and for Security Protocol select (ESP).
k. Click (Apply)
Image may be NSFW.
Clik here to view.
Test that the LAN-to-LAN connection has been established
Check that the VPN tunnel between the two routers has been established:
1. In the Vigor 3900 router go to VPN and Remote Access >>Connection Management menu. The VPN connection status will indicate that
you are now connected.
Image may be NSFW.
Clik here to view.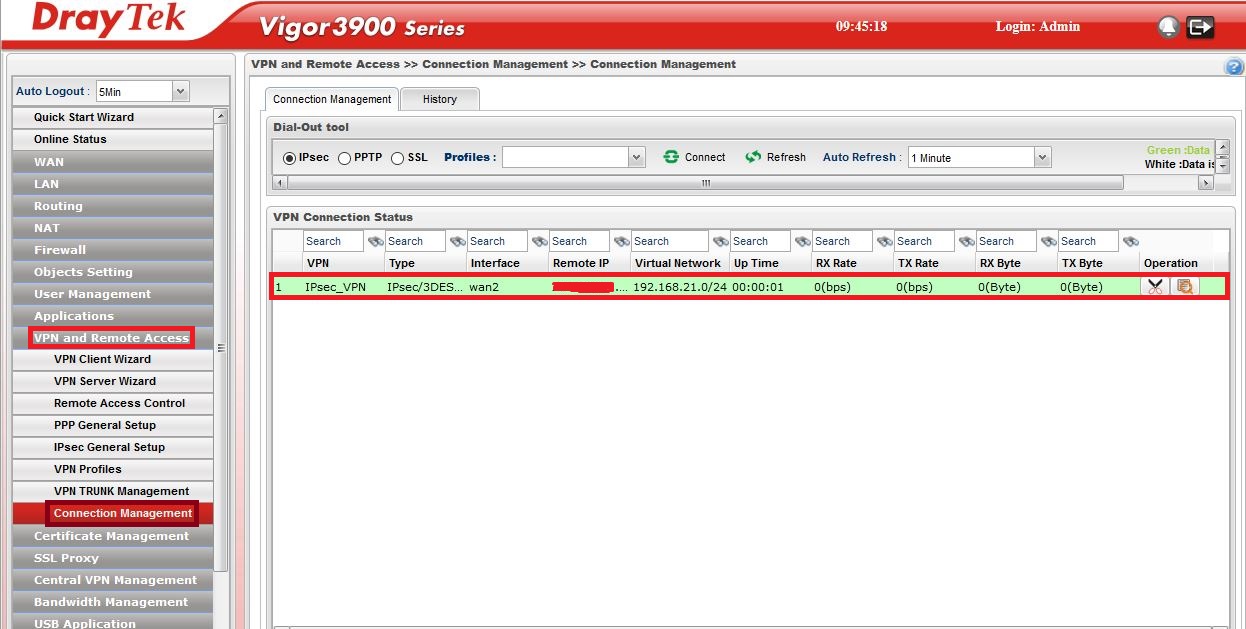
2. Perform the same check in the Vigor 2860.
Image may be NSFW.
Clik here to view.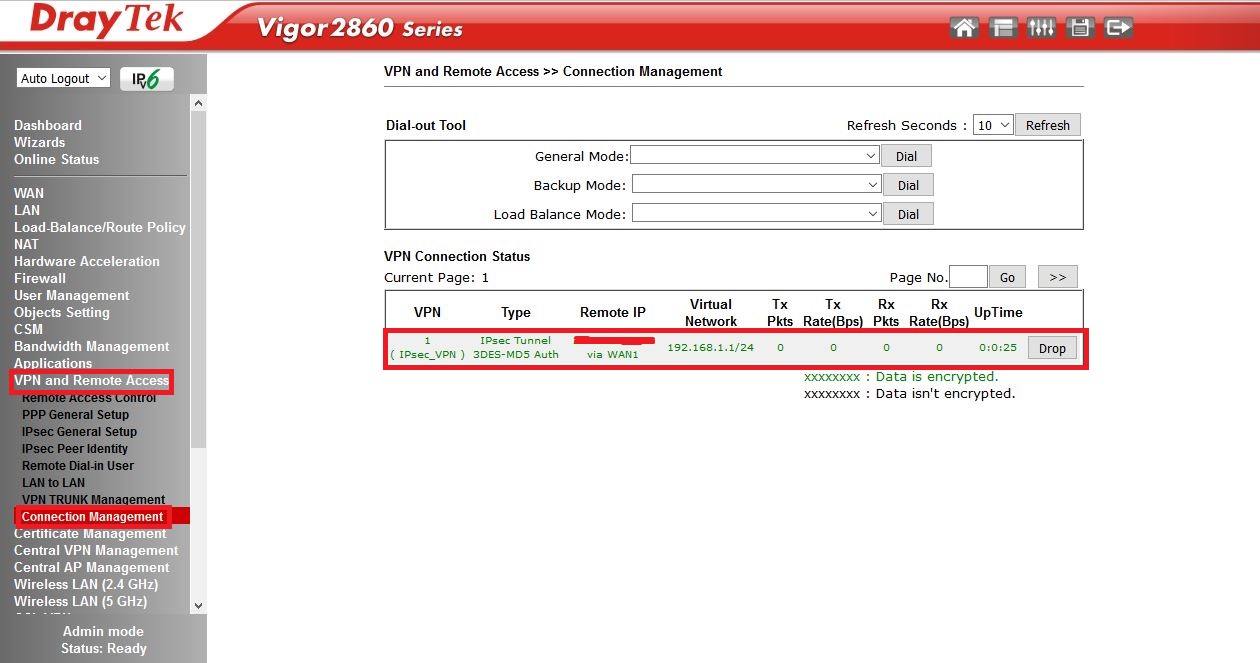
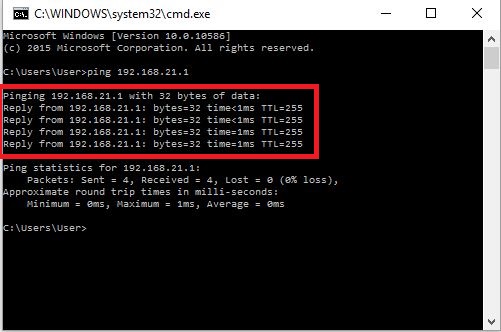
3. Use PING command to test VPN connection.
Image may be NSFW.
Clik here to view.